Creating your dream outdoor kitchen is more achievable than ever with custom-built outdoor kitchen cabinets. Whether you’re a seasoned DIY enthusiast or tackling your first outdoor project, Werever makes it simple with precision-cut cabinetry, expert design services, and detailed installation guides.
In this article, we’ll walk you through how to DIY your dream outdoor kitchen using Werever cabinets — from planning and preparation to a flawless installation.
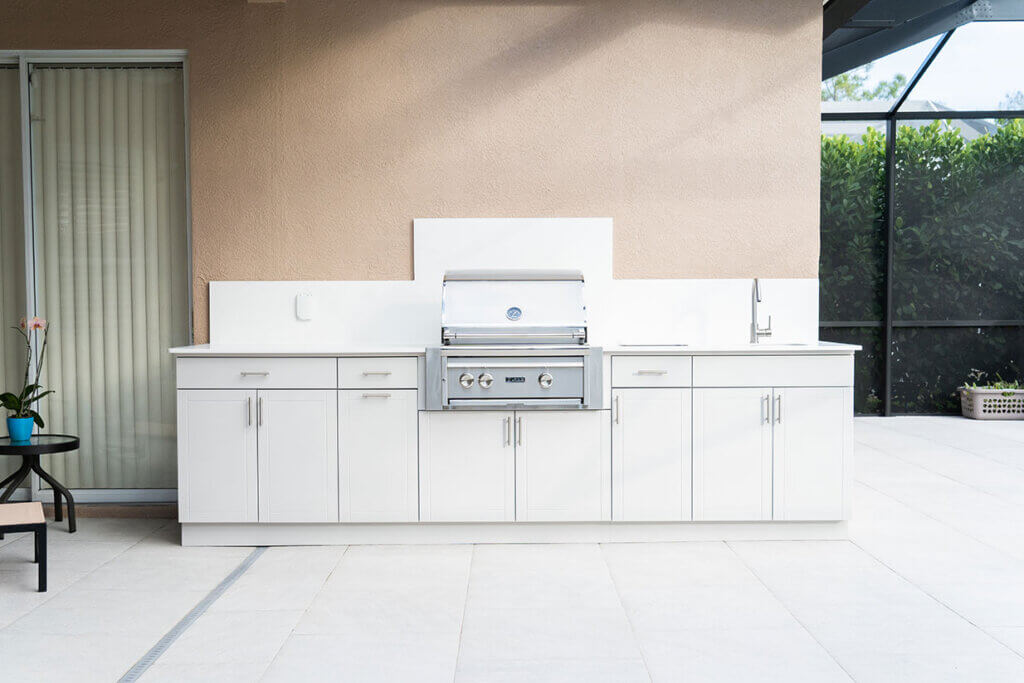
Why Choose Werever Outdoor Kitchen Cabinets?
Werever specializes in high-quality cabinetry built for outdoor environments, combining durability, beauty, and ease of installation. Our outdoor kitchen cabinets are custom-cut to fit your exact space, providing a seamless and professional finish. Unlike one-size-fits-all prefab options from big box stores, every piece is made to your measurements, ensuring a perfect fit and long-lasting performance.
Step 1: Utilize Our Free Design Service
Skip the process of having to build an outdoor kitchen frame entirely. Our free design service connects you with one of our in-house experienced designers to plan your ideal layout. The process is simple:
- Submit photos, measurements, and drawings of your outdoor space.
- Werever experts will develop a comprehensive PDF blueprint with three crucial views:
- Plan View: A bird’s-eye layout showing the placement of each cabinet.
- Elevation View: A 2D, front-facing view offering exact measurements without perspective distortion.
- 3D View: A realistic, perspective drawing to visualize how your completed kitchen will actually look.
This custom blueprint ensures accuracy, eliminating guesswork and helping you avoid costly mistakes.
Step 2: Understand Key Installation Principles
Proper installation hinges on three fundamental principles: ensuring your cabinets are level, plumb, and square. These are critical for maintaining straight outdoor cabinet doors.
Here’s what each term means in the context of outdoor kitchen cabinetry:
- Level: Cabinets must be perfectly horizontal to ensure countertops sit flush and doors open and close smoothly.
- Plumb: This refers to vertical alignment, making sure cabinets stand straight up and down (especially against a backdrop), preventing sagging and misalignment.
- Square: Ensuring cabinets meet at perfect 90-degree angles is critical for clean joins and an aesthetically pleasing layout.
By consistently checking these factors, you’ll achieve a polished, professional result that not only looks great but functions perfectly.
Step 3: Get the Right Tools
To make your installation smooth and efficient, you’ll want to have the right tools ready. Here’s what we recommend:
- Level: Have two on hand — one long and one short — to check surfaces and edges easily.
- Drill: A drill with a 1/4-inch bit will let you finish pre-drilled holes or create new ones as needed.
- Phillips Head Screwdrivers (2): Essential for fastening hardware and making adjustments.
- Clamps: Choose clamps with rubber pads to avoid scratching the cabinetry while holding pieces in place.
- Dry Erase Markers: Perfect for marking cut lines or notes on the cabinet material without leaving permanent marks.
- Saw: Either a circular saw or table saw will work for trimming fillers and toe kick pieces.
- Carpenter’s Square: To verify right angles and ensure your cabinets are square.
- Tape Measure: For double-checking all measurements during installation.
Having these tools at the ready will save you time and frustration, helping you achieve the clean, precise look you want.
Step 4: Install Your Custom Cabinets
Once your cabinets arrive, follow our detailed installation instructions to guide you through the process. Here’s an overview of the steps:
- Prepare your site by confirming the surface is flat and stable — concrete pads or pavers work best.
- Carefully unpack and inspect your cabinets to ensure they arrived in perfect condition.
- Begin installation with the corner or end units, anchoring your layout.
- Check level, plumb, and square continuously using a bubble level and framing square.
- Secure adjoining cabinets together first, then anchor them to walls or flooring as needed.
- Install the included door hardware to ensure smooth operation and longevity.
Step 5: Team Up — It’s Better as a Two-Person Job
While these cabinets are designed for DIYers, this project is best tackled with a partner. Having a second set of hands makes it easier to:
- Hold cabinets in position while fastening.
- Double-check level, plumb, and square alignments.
- Complete the installation efficiently, often in just a few hours.
Step 6: Enjoy Your New Outdoor Kitchen
With your cabinets installed and secured, you’re ready to add countertops, appliances, and finishing touches. Thanks to Werever’s precision-cut cabinetry and custom design services, you’ll have a professional-grade outdoor kitchen — crafted by your own hands.